Archive for the ‘dessert’ Category

Chewy Chocolate-Chip Cherry Oatmeal Cookies

March 19, 2009

I’m not really one for cookie-baking.  I CAN, certainly – and I have some kick-ass amazing cookie recipes – but for as often as I’m creating in the kitchen, I don’t make cookies very much.

The other day, though, my mom called.  She’s in the midst of some pretty scary health-related nightmares right now, and I’ve been trying to figure out something – anything! – I can do to help her.  It turns out, she thought of me alongside a craving she was having for oatmeal cookies.  Go figure.

Since Mom was treated for throat cancer last year, she has a hard time eating at all.  When she told me that she was actually craving something, I jumped on it.

Because of her difficulty eating – she has a hard time chewing, her salivary glands were damaged by the chemo, and she often chokes when trying to swallow – I rooted around and found the most gentle oatmeal cookie recipe I could find.  To make a traditionally hearty cookie a little more friendly, I used quick-cooking oats (which are really just regular oats sent through a chopping process to make the grains finer; if you go that route, use about a quarter cup fewer oats than if you were using regular rolled oats), and I eliminated the raisins and nuts.  You should feel free to play with this recipe, though; it’s a good, basic foundation that will take a lot of liberal fiddling.

Start out with a stick and a half of butter at room temperature, one egg, a healthy blop of vanilla extract (I use about a tablespoon) a cup and a quarter of packed light brown sugar, and one third of a cup of milk.  Using a hand mixer (or in the bowl of your KitchenAid), whir this around until it resembles (I can’t believe I’m saying this) vomit.  I know – nasty! – but that’s really what it looks like.  Of course, it’s sweet and smells cloyingly of vanilla, but if I didn’t know what it was, I’d be entirely put off by how it looks (and what is it about some of my favorite recipes resembling, at a particular stage in their assembly, the one thing I can’t stand?  Remember the barbecue sauce recipe?  Sheesh!).

ANYWAY… once you’ve got the butter-sugar-egg all mixed up, get out a new bowl and put in a cup of all purpose flour, three cups of rolled oats (or two and a half or so, if you’re using the quick-cooking type), a half teaspoon each of baking soda and salt (though I consider the salt to be entirely optional in this recipe), and a quarter teaspoon or so of cinnamon (more or less, depending on your preferences).  Toss those together and, with a stout wooden spoon, stir them into your butter-sugar-egg mess.

At this point, add whatever makes you happy.  I left a quarter of the batch plain for mom, then finely chopped up a handful of dried cherries for her other quarter.  For our half, I added quite a few more dried cherries and just a few too many chocolate chips. I could also imagine adding pecans, flaked coconut (you could substitute a little of the vanilla for coconut extract if you like), traditional raisins (if that’s your thing), M&Ms – really, go wild here.

Drop the batter in generous little heaps on parchment or a lightly greased cookie sheet (or, if you have one, one of those neat-o, cool Silpat mats.  GODDESS, but I love those things!) about two inches apart and pop them into a preheated 375° oven for about ten minutes.  You want them to be lightly browned, but still a little soft in the middle.  Cool them off the sheets (that’s where Silpat or parchment comes in handy; you can just slide the whole batch right on to the cooling rack so the heat of the sheets won’t keep them cooking).  Though I don’t think they’ll last long enough for any long-term storage (they’re some kind of yummy!), they’ll keep in airtight containers at room temperature for about a week; in the fridge for slightly longer, and in the freezer for quite a bit longer (though, of course, you’ll want to bring them to at least room temperature before consuming).  I have to say here, too, that popping them in the toaster oven to give them a little bit of warm is absolutely delightful, especially if there’s chocolate in them.

img_2904

Happy Cookies!

Cheese Soup

January 7, 2009

A couple of years ago, I was attending a seminar at Not-So-Local College and had the pleasure – and I’m not being sarcastic – of eating in the dining hall.  At the time, I was more than a little incredulous -I mean, really, the dining hall?!? – but I soldiered on and grabbed a tray.

I ended up at the soup-and-salad bar and poured myself a bowl of Canadian cheese soup*.  It was gorgeous, and in my ecstasy, I hunted down a man with a little chef’s hat and begged him for the recipe.  He came back with instructions for making gallons of the stuff, but this is no problem; I married an engineer – I made him do the math.

Start by dicing (or grating to near-invisibility, if that’s what your family requires) a medium-sized onion, and chopping up some carrots and celery.  I’m not particular about the measurements (and, to tell the truth, I almost never even have celery in the house, so that usually gets skipped altogether), but it usually works out to about a pound or so of vegetables.  Dump these in the bottom of a large stock pot and drop in a stick of butter.

img_2389

Let the veggies cook in the butter over medium heat until they’re just starting to soften, then sprinkle over about 2/3 of a cup of all-purpose flour.  Stir that around until all the butter is absorbed and you’ve made a lumpy paste.  Let it cook for about five minutes or so – you want to cook out the raw taste in the flour – then pour over about three cups of chicken stock (you can use veggie stock if you prefer, but not beef, I think).  Using a whisk, stir the stuff until you can’t discern any more lumps of flour paste, then reduce the heat to low and let it simmer until the carrots are tender.  At this point, you can keep the soup simmering all day if you want.

img_2390

Just before you’re ready to serve, stir in way more cheese than you think you need.  No, seriously; the recipe converted to two pounds of cheese.  My family is all about the extra sharp cheddar, but I bet you can use whatever cheese you want as long as it’ll melt well (I’d avoid the mozzarella, but if you like stringy, go for it).  Once the cheese is melted in, stir in 2-3 cups of half-and-half (I cut the half-and-half 50/50 with milk, but if you want to go full-boat, go for it!).   You can augment or garnish to your heart’s desire; the original recipe called for a green scallion garnish, but I’m the only one who likes scallions, so I just grind just a little black pepper over each bowl before I serve it and everyone’s happy.  I’m betting that you can sprinkle over a dash of cayenne pepper or drip in some Tabasco, you could add some diced potatoes to the simmering stage, you could sprinkle over some crispy bacon bits just before serving or drop some diced ham in the bottom of the bowl  – be creative!

This soup is fantastic all on its own.  I serve it in bowls with a side of buttered bread, and my family practically inhales it.  I do have to warn you that it doesn’t freeze well and is only marginally fridge-friendly, though; if you do reheat it (and we have; it’s not a total lost cause) make sure you give it a wicked stirring as it heats up because it tends to split when it cools (all that cheese reconstitutes).  If you’ve got leftovers, try to eat them the next day; this is one of the few recipes I love that doesn’t carry over very well.

YUM!

*I have no idea what’s so “Canadian” about this soup, but that’s what the recipe says, so that’s what I’m giving you.  Regardless of its nationality, it is just the thing for cold, snowy evenings…

Eggnog Poppy Seed Bread

December 21, 2008

Since I love more people than I can afford to buy gifts for during the holidays, I bake for a significant number of folks.  The edible gifts range from peanut brittle to cookies to this recipe, which is wonderfully stupid-easy, but strangely sophisticated and terribly festive.

I made a double batch.  Beanie helped.

img_2285

I’m pretty sure I got this recipe years ago from a Betty Crocker cookbook, but I’ve long since lost the original citation.  A quick check of the internet shows me, though, that all the recipes are pretty much the same, so there you have it.

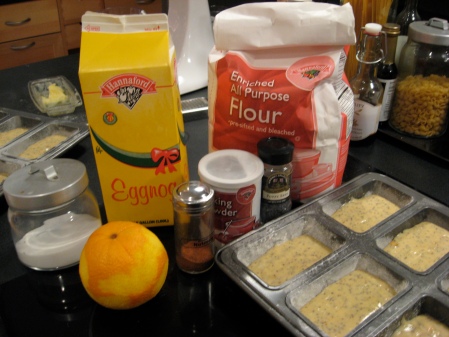
Start with 2 1/2 cups of all-purpose flour in a large mixing bowl (or, my prefered method, in the bowl of a KitchenAid).  To that, spoon in a cup of sugar and a quarter cup of poppy seeds (I NEVER measure the poppy seeds.  Those bad boys are EXPENSIVE, so I just dump in enough to ensure an even and obvious distribution.  Besides, I don’t want my friends getting busted in random drug tests).  Add 3 1/2 teaspoons of baking powder and a teaspoon each of salt and nutmeg.  Whisk these things together so that it’s all nicely mingled, and set it aside while you get on with the gooey ingredients.

In a large-ish bowl (I use my biggest Pyrex measuring cup), combine 1 1/4 cup of eggnog, 3 tablespoons of vegetable oil, one egg, and the grated zest of one orange (I used to think I could skip this step, but the brightness that the zest adds really is important).  Pour the wet ingredients onto the dry all at once and mix until it’s completely incorporated.

My usual method of baking these is in prepared individual loaf pans, but you can pour all your batter into a greased and floured standard loaf pan as well or, alternately, you can line a muffin tin with cupcake papers and cook them that way.  Regardless of your vehicle, the pans will go into a 350° oven until they’re toothpick-test done (cooking time will vary widely depending on the size of your pans; the mini loaves take about 18-20 minutes; I start testing at 15).  Since I never make these as standard loaves, I had to look up the cooking time.  The recipes I found said to start testing at about 55 minutes.

img_2287

Though I dont’t think this will hang around long enough for storage to be an issue, if you’re going to keep it for a bit – or give it as a gift in the next few days – wrap it in plastic and keep it in the fridge.

Happy, merry!

Cheese Cake

November 27, 2008

Oh, Dear Goddess.

This recipe is one of my longtime standards, and it brings me sublime joy every time I make it. Truly, you guys; there’s a bit of fussy to this recipe, but it’s worth every single bit of it in the end.

Start by setting the oven to 375, heating a kettle of water, and getting out a big roasting pan. Wrap one large or two small springform pans with tin foil and butter the insides (you can make a parchment round for the bottoms, but I don’t bother – I make the top of the cake the top of the cake – I don’t invert them when they’re finished – so I don’t care what the bottoms look like). Set everything aside for later.

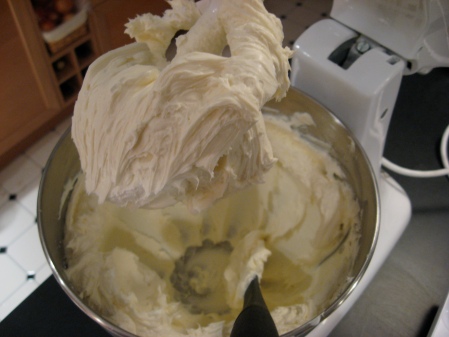
Unwrap four packages of room-temperature cream cheese. I go with the low-fat version just because that’s what I’ve always made it with, but you’re welcome to use whatever kind you choose (though I would recommend staying away from the fat-free cream cheese – it’s got a lot of extra stuff in it to make up for the missing fat and I honestly don’t know how well it would cook in the cake). Put that in the bowl of your stand mixer (thank the Goddess for KitchenAid!) and let it spin until it’s all smooth and silky, then scrape down the sides and beat it some more (this is the fussy part- the mixer will require a fair bit of scraping through the process but, like I said, worth it).

img_2210

Once you’ve worked your cream cheese into smooth ribbons, scrape in a pint of sour cream and blend the mixture until it’s good and smooth again – then scrape and spin some more. Slow the mixer down and add 1 1/4 cup of sugar and 2 tablespoons of cornstarch, then mix and scrape some more. While the mixer is running, pour in a good blop of vanilla (about a tablespoon, if you’re being fussy enough to measure) and about twice that of lemon juice (I use the bottled stuff, but only because I often don’t have fresh lemons around in the winter time, which is when I usually make cheese cake).

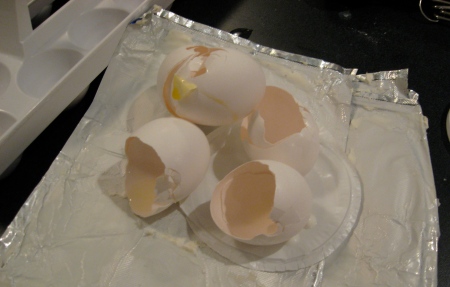
If you’ve been diligent with your stirring and scraping, you should by now have a gorgeous, shiny, smooth mass of silky whiteness in your bowl. With the mixer running, add five room-temperature eggs, one at a time, adding the next one when you can no longer discern traces of the last. I know that this is fussy, too, but there’s science behind it. The eggs (and, to a lesser extent, the cornstarch) are what’s going to form the custard that keeps the cake together (because, really, cheese cake ISN’T cake; it’s a custard). Ensuring that the eggs are well incorporated into the mixture is what’s going to make that happen. Of course, do one last stop-and-scrape, spin the mix for a tiny bit longer, then pour the whole of it into your pan(s).

img_2213

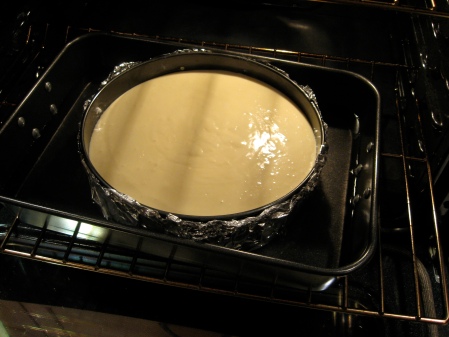
Set a large roasting pan in the center of your oven, put your springform(s) inside, and then pour the hot water from the kettle to come at least halfway up the sides. The bath is going to regulate the temperature that the cake(s) cook at and will help to make a nice, smooth, even custard.

img_2212

Let the cake(s) bake for about an hour or until just set – it’s okay if it looks a little underdone; remember, it’s a custard and, like any egg dish, if it looks done in the pan, it’s going to be over done on the plate.

After the hour’s up, turn the oven off, stick a wooden spoon between the oven wall and the door (or whatever you need to do to prop the door open just a bit), and leave the cheese cake right where it is for about another hour. Take the cake from the oven, take it out of its pan, plate it, cover it in plastic wrap, then stash it in the fridge AT LEAST overnight. Something magic happens in that time, trust me.

One can garnish this any way one chooses. I think that the original recipe called for some sort of bitter orange sauce, but that doesn’t work for me. I’ve used raspberry sauce and chocolate sauce with this, but the truth of the matter is that it’s best straight-up naked. It is smooth and sweet and sublime, just like a good cheese cake ought to be.

You’re welcome.

(finished product picture will be available tomorrow morning!)

My “Signature” Dish

September 17, 2008

For as much as I love puttering about in my kitchen (and, by the way, the banner of this site really IS my stove top), and for as much as I love cooking just about anything, my real joy is in sweeties. I adore baking, perhaps more than any other culinary operation. I’m not sure what it is about baking that appeals to me so much; whether it’s the homeyness of the process of measuring and stirring, the licking of spatulas and beaters, the tantalizing smells emanating from the oven, or the comfort of the end results of the effort, baking is, and probably always will be, where I feel I do my best work.

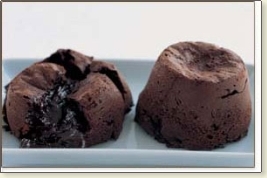
If I have a “signature” creation, it’s this: babycakes. I boosted this recipe directly asset_1203_hl.jpgfrom my Food T.V. heroine, Nigella Lawson. Here is a woman who is neck-deep in the love of food – her t.v. shows are straightforward and no-nonsense, and often end with her in her bathrobe, eating straight from the refrigerator. She licks her fingers, she makes a mess, and she doesn’t go in for itty-bitty portions when the cameras are rolling, either; she’s got curves and she’s not ashamed of them. I love her practicality; she makes me feel comfortable and capable, and I dig her for that.

This recipe was taken directly from her book – one of the most treasured of my cookbook collection – How to be a Domestic Goddess: Baking and the art of Comfort Cooking. Six ingredients, almost NO effort, and consistently stunning results. I’m going to copy directly from the page in her cookbook, and I can’t recommend this tome enough – seriously, go get it. You won’t be sorry.

Molten Chocolate Babycakes

These are the acceptable face of culinary cute: their intensity guarantees the triumph of chic over prettiness. And, what’s more, they’re easy to make. You can make the mixture up a few hours in advance (Chili’s note – you can make them DAYS in advance; they keep like a dream) and put it ready and waiting in the prepared cups in the refrigerator until you want to cook them, which must be at the moment you’re ready to eat them. You might think that preparing the cups sounds fiddly, but in fact the job is just demanding enough to make one feel uncharacteristically competent, but not so much that any actual dexterity is required.

This recipe comes by way of the great James McNair, America’s gastro-compendium made flesh.

scant 1/4 cup soft, unsalted butter, plus more for greasing

12 oz of the best bittersweet chocolate

1/2 cup of sugar

4 large eggs, beaten with a pinch of salt

1 teaspoon vanilla extract

1/3 cup of all-purpose flour

6 individual 6 oz custard cups, buttered (Chili’s note – Ms. Lawson calls for lining the cups with baking parchment. I skip that step altogether and am skipping its trancsription here- it’s just too fussy for me – and instead I butter the cups very well then dust them with a generous coating of cocoa powder. It works better, I think, than fussing with parchment).
Unless you are making these up in advance, preheat the oven to 400°F, putting in a baking sheet at the same time.

Melt the chocolate and let it cool slightly. Cream together the butter and sugar, and gradually beat in the eggs and salt, then vanilla. Now add the flour, and when all is smoothly combined, scrape in the cooled chocolate, blending it to a smooth batter.

Divide the batter between the 6 custard cups, quickly whip the baking sheet out of the oven, arrange the little cups on it, and replace it in the oven. Cook for 10-12 minutes (the extra 2 minutes will be needed if the puddings are refrigerator-cold when you start) and as soon as you take them out of the oven, tip out these luscious babycakes onto small plates or shallow bowls. Serve these with whipped cream, the same unwhipped in a pitcher, creme fraiche, custard, or ice cream.

The only thing that I’d suggest is getting out the food processor and blitzing the sugar; sometimes, I find these to be a bit grainy and breaking the sugar up helps that tremendously. I also vary the procedure a bit; I tend to melt the butter and the chocolate together with good results, but it’s not enough of a variation to make that much of a difference (usually, I do the chocolate and the butter together because I’ve not got any soft butter laying around).

I’m likely to make a double-batch of these and stash all but two in the fridge, wrapped in plastic wrap (while the girls do like these, the cakes are a bit too bittersweet for them. This is more of a “grown-up” dessert). The cakes cook up just beautifully in the toaster oven; no need to fire up the big box. Finally, I like to under-cook these just a bit; they’re supposed to be gooey in the middle, but I like them even gooier than that.

asset_499_hl.jpg
Today was my friend Xena’s birthday and, after taking her out to our local steak house for a slab o’ beef, we came back to the house where I whipped a batch of these up.  Twenty minutes from nothing to yummy.  Just make sure you’ve got plenty of cold milk on hand.

cake image credit

Ms. Lawson image credit

Auntie’s Cake

August 11, 2008

My sister is a woman with very simple, but very specific, needs.  She needs friends and interaction and loving relationships.  She needs baseball.  She needs ready access to Dunkin’ Donuts.  She needs to be able to spend time outdoors being active, and she needs chocolate cake for her birthday.

I don’t remember when I started baking this cake for her for her birthday, but I know it’s been a while.  Unlike the other people in my family who ask for different birthday sweeties every year, Auntie wants this; simple, uncomplicated, and yummy.  I’m more than happy to oblige.

I got this recipe from a Hershey’s cookbook that I think I got for a dollar at a library book sale when I was a teenager.  My only complaint about it is that sometimes it bakes unevenly – it will come out of the oven domed on one side and low on the other – but that never, ever takes away from its consistent yumminess.

Start by preheating your oven to 350 and greasing and flouring whatever pans you’re going to use (I often make this in a 9×13 rectangle, but it works just as well as rounds or cupcakes.  To be honest, I’ve never tried it in shaped pans –  mostly because I don’t have any – so I don’t know if it will work in, say, a castle pan).  Sift together 2 cups of white sugar, 1 and 1/3 cups of all purpose flour, 3/4 of a cup of cocoa powder (this is the reason I use the sieve; cocoa powder is most often lumpy), 1 and 1/2 teaspoon of baking powder, 1 and  1/2 teaspoon of baking soda, and 1 teaspoon of salt, then set that bowl aside.

In a measuring cup, whisk together 2 eggs, 1 cup of milk 1/2 cup of vegetable oil, and 2 teaspoons of vanilla (adding more if you like; I never measure vanilla so I’m pretty sure that I always add more than is called for).  Stir this into the sifted dry ingredients, then add 1 cup of boiling water.  The batter will be really thin; don’t panic – it will be fine.

How long it’s going to take to cook depends entirely on the shape of your pans and the accuracy of your oven.  For the 9×13, I set my timer at 25 minutes and check every 5 minutes or so from there – more or less, depending on how it seems to me.  The old toothpick test is a perfect gauge.

Now, I’m not sure if it’s the cake that Auntie loves, or the frosting.  I ice this cake with a combination of chocolate chips, about 1/2 a cup’s worth, melted with a tablespoon or so of butter, then cooled a bit.  I stir that into a pint of low-fat sour cream (no, the low-fat bit isn’t for the calories, but because the low-fat version has a consistency that’s better suited for this purpose) and then add a few tablespoons of Ghirardelli ground, sweet chocolate to round the whole thing out.  The combination of the depth of the chocolate chips, the tang of the sour cream and the dusky sweetness of the ground chocolate really is heavenly; I never have any trouble finding someone to lick the spatulas.  Remember, though, that the cake can’t sit out on the counter for more than an afternoon before it should be put in the fridge; the sour cream won’t hold up well at room temperature.

Make sure you’ve got plenty of milk!

YUM!

Blueberry Bread

July 3, 2008

This is my favorite kind of stupid-easy recipe. Not only is it truly stupid-easy, but it’s handed-down stupid-easy. It’s stupid-easy with history, People, and that’s the best kind!

I was given this recipe by my adopted grandmother. This woman is truly the embodiment of grandmotherly loveliness, and she’s a practiced hand in the kitchen. She makes this recipe a lot – as do I – because it’s both easy and versatile. One doesn’t need blueberries – one can use pretty much ANY yummy filler – or none at all; one can make a cake or a loaf or cupcakes; one can eat this as dessert or a snack or breakfast. Truly, it’s culinary acrobatics at its finest, and here’s how you do it:

Set your oven to 350° and either grease and flour your pans or line cupcake tins with papers and set aside. Cream together a stick of butter with one egg and a cup of sugar and set aside. Sift together 2 cups of flour, 2 teaspoons of baking powder and 1/2 teaspoon of salt, then pour, into a separate container (I use my Pyrex measuring cup), one cup of milk with a good blop of vanilla extract (the recipe calls for 1 teaspoon, but I’m SURE I use more than that; I never measure it and I have a particular affinity for vanilla). Bring the butter mixture back and add the flour and milk alternately until all the ingredients are combined. Fold in about 2 and 1/2 cups of blueberries (or whatever mix-in you’re adding) and turn the batter into whatever cooking vessel you’ve prepared. Sprinkle the top with sugar, if you’re into that sort of thing – and bake in the center of the oven for about 30 minutes for the loaf pan; your baking time will be decidedly less – only about 11 minutes or so – if you’re baking in a cake pan or cupcakes, so keep an eye on them. They are done with the toothpick test.

I make this most often with blueberries, but I’ve also had fantastical luck with cinnamon and brown sugar swirled through, chunks of peaches, strawberries, and even rhubarb and raspberries. It is a consistent winner, and I hope you enjoy it half as much as we do.

Muddy Dirt Cake *EDITED!*

May 25, 2008

Several years ago, I made a chocolate cake for my daughter’s birthday. Nothing special, really – just a chocolate cake that I was intending to frost with chocolate frosting.

You know what they say about intentions and the road to hell, right?

I’m not sure how it happened, but the cake would not come out of the pans. YES, I greased and floured the pans; I’m a Goddess in the Kitchen, remember? For whatever reason – whether the oven temperature was off or the humidity was wrong or the moon was in retrograde – those cakes dug in and hung on, and the only way I could get them out of the pans was in pieces.

There I was with a recipe’s worth of cake bits. Frustrated, but entirely undaunted (by then, I’d learned to look at challenges as just that – challenges – and to not let myself get too worked up), I came up with a plan. I further crumbled the bits and put them in a glass dish. Then I put together a couple of batches of chocolate pudding; the cook-and-serve kind because, really? Instant? Not so much. (And yes, I use pudding mixes. Like brownies, the stuff from the box just comes out consistently better.) Once the pudding had chilled, I folded it into the cake bits, blopped a little bit of whipped cream on top and voilla! Muddy Dirt Cake. Though it wasn’t PRETTY, the dirt cake went over HUGE with the under-five set. The grown-ups seemed to like it pretty well, too.

I’ve made this cake on purpose several times since then. Sometimes I use boxed cake mix, sometimes I start from scratch, but I always use Jello or Royal cook and serve chocolate pudding for the “mud” component. My family doesn’t require theatrics, but if they did, I would pretty this up by serving it in a clean (preferably glazed) flower pot and sticking either sugared or silk flowers in. You could make it more kid-friendly (as if it’s not enough already!) by mixing in some gummy worms and putting some candy bugs on the top. Either way, this is stupid-easy yumminess at its finest.

Edited to include this photo of Punkin’ Pie’s 11th birthday cake, complete with silk flowers and gummy worms.  The girls came to the table and didn’t know where the cake was until I pointed it out to them.  It was a HUGE hit:

Rhubarb-Pecan Bread

April 25, 2008

A few years ago, I took a graduate class titled “Literature in Early America.” The class was taught by an amiable professor who also happens to be one of the country’s leading experts in Shaker history, literature, and culture. The class covered a whole lot of other literary traditions, but that little group figured heavily into the mix.

The class was a lot of fun, not only because the professor was a lot of fun, but because he was genuinely interested in allowing us to learn in ways that made sense to us; he didn’t prescribe assignments so much as make suggestions for our investigation. For example, one of the projects he offered up was a gravestone study. We studied the art and iconography of colonial gravestones! In a LIT class! It was fantastic! I got to research on of my (adopted) ancestor’s stones in a nearby town and wrote quite convincingly that his stone was more ornate and larger than his parents’ simple carved boulders because he managed to achieve a much higher status in the community; he became a Supreme Court judge – one of the first in the colony.

But I digress…

The final project for the class was left almost entirely up to the discretion of the student, and I decided that I would study the Shakers. We have a couple of Shaker villages in New England – one of which is still a living community – and I’ve always been interested in their art and, more importantly, their cuisine. I came up with the idea to do my final project around a Shaker meal, that I would cook for my class, and relate the idea of cooking to the foundation and maintenance of family. In Shaker tradition, the group is considered a family, and that concept of relation is essential to their community and their faith. I would investigate how cooking and sharing meals together helps to create and strengthen familial bonds, and then connect all that to some poetry and songs that the Shakers hold as foundational to their faith.

francis4.jpgMy professor loved the idea (as did my classmates, who were looking forward to a home-cooked meal in class). After an introduction to Sister Frances through my professor, I was invited to spend a day in the kitchen, helping her prepare the noon meal for the family. We talked about her history in the kitchen, we talked about my children and my schooling and my plans to be a teacher (doesn’t she just look like a friendly grandma who would ask me about such things?). We baked chickens and peeled potatoes. We set the table, said prayers with the family, and ate together. We had a lovely afternoon and, when it was all over, I left with a couple of recipes and some memories that I pull out every spring around rhubarb season.

One of the recipes I was given was this one. It’s for a quick bread whose main flavors are rhubarb and pecan, and it’s fantastically yummy (and easy; remember what I said about how much I love yummy and easy?). Because good things should ALWAYS be shared, I’m sharing this – another of my favorite recipes – with you.

Rhubarb Pecan Bread

Preset your oven to 350•


1 1/2c brown sugar
1 beaten egg
2/3c vegetable oil

Combine these in a large bowl and set aside.


1t baking soda
1t vanilla
1c buttermilk
1t salt

Whisk these together in a measuring bowl.

Measure out 2 1/2 c flour and add to the sugar, egg, and oil, alternating with the milk mixture.

Stir in 1/2c chopped pecans and 1 1/2c chopped rhubarb (I usually add more rhubarb than that, but that’s just me).

Pour into greased and floured pans, sprinkle with sugar, and bake 1 hour or until the loaves test done. I tend to bake these in mini-loaf pans, so they’re portable and giftable.

(*I nailed the final assignment. I brought in Shaker fried chicken, mashed potatoes and gravy, green beans and scallions, the rhubarb bread and a Mother Ann cake. How could I POSSIBLY get a bad grade for that?)

First Course

March 15, 2008

I’ve been meaning to open this site for a while now; not only do I love to share recipes (and I love to receive recipes that others are willing to share), but I’ve long longed for a place where I can keep all my favorites in one easy-to-search spot.

Welcome, then, my friends, to Mrs. Chili’s online kitchen! Pull up a chair and grab a spoon!

Almost all of my favorite recipes are what I proudly call “stupid-easy.” They’re concoctions that are crazy-simple to put together but which consistently earn me acclaim and adoration and the reputation as a Goddess of the Kitchen. I sometimes feel guilty about accepting the accolades for these dishes – I’m certain that if my diners knew how easy these recipes are to throw together, they might be a little more stingy with their praise.

My plan here is to give you the recipe as I found it (if such a thing exists; often, I make stuff up as I go), then give you the modifications that I’m likely to make when I cook the recipe myself. If you come up with another way of tweaking the instructions or the ingredients, be sure to let me know!

The first recipe I’m going to share here is one of my most favorite comfort foods, and truly one of my most simple recipes – seriously; five ingredients and no special skills required. I hope that you enjoy it as much as I do.

Vanilla Rice Pudding

In the bowl of a slow cooker or a large saucepan, combine

1/2 cup of arborio rice

3 cups of milk, 1 cup of cream

1/4 cup of granulated sugar

1 tablespoon of vanilla extract.

Simmer on low, covered, until the rice is al dente and the mixture is thick.

Sometimes, I’ll go exactly half and half on the milk and cream – 2 cups of each – and sometimes I’ll go with 3 cups of actual half-and-half and one cup of milk if I’m out of heavy cream. I tend to go a tiny bit heavy on both the sugar and the vanilla, and I’ve discovered vanilla bean paste (which I buy at Trader Joe’s) which imparts a lovely speckled look to the dish. I suppose one can also split and scrape a vanilla bean and leave it to simmer in the rice, but I almost never have whole vanilla beans around my kitchen.

How quickly I want this in a bowl is going to determine which cooking method I’ll use – the stovetop is a bit quicker than the slow cooker, but the stovetop also requires a bit more of my attention than the Crock Pot. I’ve also been known to stir everything together in a lidded baking dish and put it in a 250° oven, but only if I’ve got all day.

I serve this both warm and cold though, to be honest, I only eat it cold right out of the container while standing in front of the open refrigerator door.

YUM!